10 Tips for Spring Cleaning Your Home’s Moisture Management Systems
Spring is a great time to do some deep cleaning around your home, and one area that is often overlooked is your home’s moisture management systems. Moisture problems can cause a variety of issues, including mold growth, wood rot, and damage to your home’s structure. In this blog post, we’ll share 10 tips for spring cleaning your home’s moisture management systems. By following these tips, you can help prevent moisture-related issues and keep your home healthy and comfortable. From checking for leaks to using exhaust fans and dehumidifiers, these tips will help you get your home ready for the warmer months ahead.
1. Check for Leaks
To check for leaks, start by examining the visible pipes under sinks, behind toilets, and in other areas of your home. Look for any signs of water, such as drips or puddles. If you don’t see any visible leaks, try running water in your sinks, tubs, and showers and flushing your toilets while keeping an eye out for any changes in water pressure or leaks.
If you do find a leak, it’s important to address it as soon as possible to prevent further damage and excess moisture in your home. In some cases, you may be able to repair the leak yourself with a simple fix, such as tightening a loose fitting or replacing a washer. For more complex leaks, or if you’re unsure of how to fix the issue, it’s best to contact a professional plumber who can diagnose and repair the leak for you.
2. Inspect Gutters and Downspouts
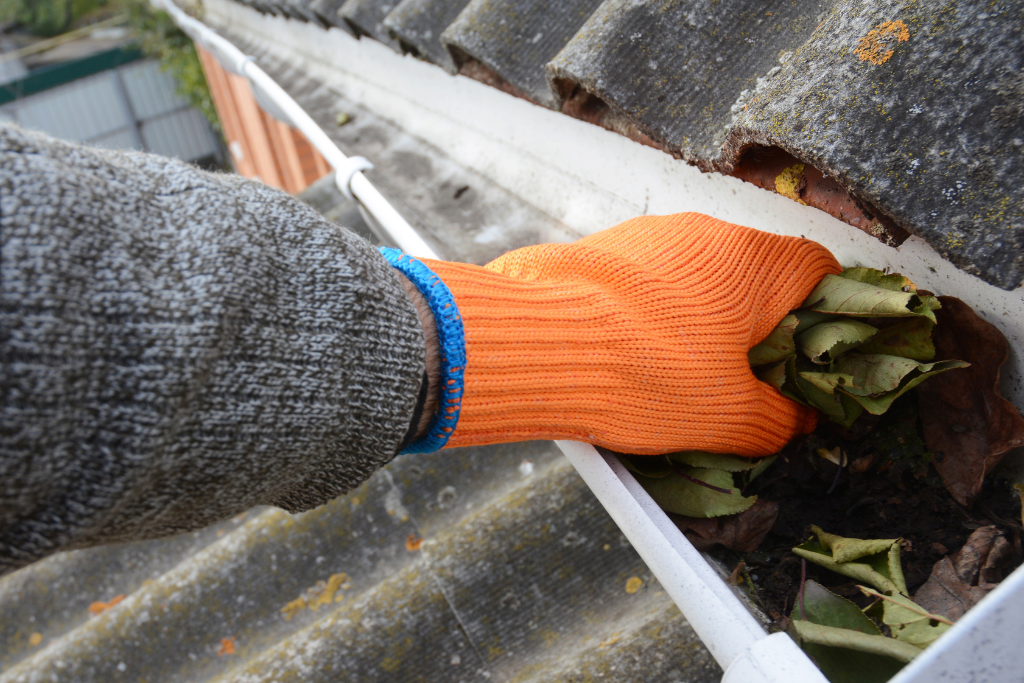
Gutters and downspouts play a crucial role in directing rainwater away from your home’s foundation and preventing excess moisture from building up around your home.
To inspect your gutters and downspouts, start by examining them from the ground for any visible damage or debris. Look for signs of rust, cracks, or sagging, which can indicate that the gutters or downspouts need to be repaired or replaced. Next, climb a ladder to get a closer look at the gutters and downspouts. Clear out any debris, such as leaves or twigs, that may have accumulated in the gutters and downspouts. This will help ensure that rainwater can flow freely through the system and won’t overflow and cause water damage to your home.
While you’re inspecting your gutters and downspouts, be sure to also check that they are properly attached to your home and that there are no gaps or leaks where water can escape. If you do find any damage or issues with your gutters and downspouts, it’s important to address them promptly to prevent further damage to your home’s foundation and moisture-related issues.
3. Vent Dryer Outside
Venting your dryer outside is an important step in spring cleaning your home’s moisture management systems. When you use your dryer, it produces hot, moist air that needs to be vented outside. If the air is not vented properly, it can lead to excess moisture in your home, which can cause mold growth, wood rot, and other moisture-related issues.
To ensure that your dryer is vented properly, start by checking the vent hose for any obstructions or damage. Remove the hose from the back of the dryer and inspect it for any lint or debris that may have accumulated. Clean the hose using a vacuum or a brush designed for this purpose. Next, check the vent hood outside your home to make sure it is not obstructed by any debris or animal nests. If necessary, clean the vent hood using a brush or vacuum.
Once you’ve ensured that the vent hose and vent hood are clean and free from obstructions, reattach the vent hose to the back of the dryer and make sure it is securely attached. Turn on the dryer and check the vent hood outside to make sure that air is flowing freely.
It’s important to vent your dryer outside to remove excess moisture from your home. If you’re not sure whether your dryer is vented properly, or if you’re experiencing excess moisture in your home, consider hiring a professional to inspect your dryer and venting system.
4. Ensure Sump Pump is in Working Order
Sump pumps help to prevent flooding and excess moisture in your basement by automatically pumping out any water that accumulates in the sump pit.
To ensure that your sump pump is working properly, start by testing it. Locate the sump pump in your basement and pour water into the sump pit until the float valve rises and activates the pump. Make sure that the pump turns on and pumps out the water. If the pump doesn’t turn on or if it fails to pump out the water, there may be an issue with the pump or the electrical connections. In this case, it’s best to contact a professional to diagnose and repair the issue.
5. Check Attic and Crawlspace
Attics and crawlspaces are often overlooked areas of the home, but they can be prone to excess moisture and humidity, which can lead to mold growth, wood rot, and other moisture-related issues.
To check your home’s attic and crawlspace, start by examining the area for any signs of moisture or water damage, such as water stains or mold growth. Look for any areas where air may be leaking into the space, such as around pipes, vents, or electrical wires. These gaps can allow humid outdoor air to enter the space, which can lead to excess moisture and humidity.
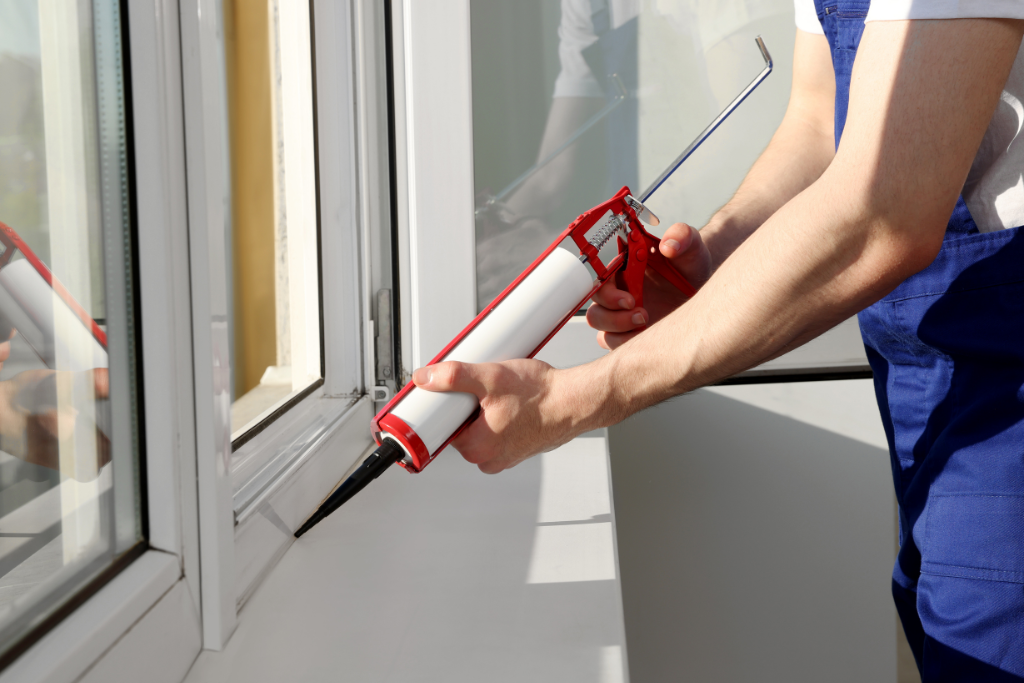
6. Seal Windows and Doors
To check for gaps around your home’s windows and doors, start by examining the area for any visible gaps or cracks. Check the weather stripping around the windows and doors to ensure that it is in good condition and isn’t damaged or worn. You can also use a candle or incense stick to detect any drafts around the windows and doors. Hold the candle or incense stick near the windows and doors and look for any movement of the flame or smoke, which can indicate a draft.
Once you’ve identified any gaps or cracks, seal them with caulk or weather stripping. Caulk is a flexible material that can be used to seal gaps around windows and doors, while weather stripping is a material that can be applied around the edges of windows and doors to help seal them. Be sure to use a high-quality caulk or weather stripping that is specifically designed for the type of window or door you have.
7. Use Exhaust Fans
Start by identifying the areas in your home where exhaust fans are installed. Common areas include the kitchen, bathroom, and laundry room. Check to make sure that the fans are working properly and are vented to the outside of your home. If the fans are not vented to the outside, moisture can build up in the attic or crawlspace, which can lead to mold growth and other moisture-related issues.
If you don’t have exhaust fans in your home, consider installing them in the kitchen, bathroom, and laundry room. Be sure to choose fans that are appropriately sized for the room and are designed for moisture removal.
By using exhaust fans properly, you can help remove excess moisture from the air and prevent mold growth, wood rot, and other moisture-related issues. Regular maintenance and cleaning of your home’s exhaust fans is an important part of keeping your home’s moisture management systems functioning properly.
8. Use Dehumidifier
Using a dehumidifier is an effective way to control excess moisture in your home and prevent moisture-related issues like mold growth and wood rot. A dehumidifier works by removing moisture from the air, which helps to reduce the humidity levels in your home.
In addition to using a dehumidifier, it’s important to identify and address the source of excess moisture in your home. This may include fixing leaks, improving ventilation, and ensuring that your home’s moisture management systems are functioning properly.
9. Replace Air Filters
Replace Air Filters: Replace the air filters in your home’s HVAC system to ensure proper air flow and filtration, which can help reduce moisture levels in your home.
10. Check Insulation for Moisture
While inspecting your home’s insulation, be sure to check for signs of moisture, such as discoloration or mildew. Moisture can reduce the effectiveness of insulation and can even cause it to deteriorate over time. If you find any moisture issues, address them promptly and consider upgrading to a moisture-resistant insulation material in areas prone to high humidity or moisture.
Spring Cleaning Your Moisture Management Systems with Jersey Shore Crawlspace
We offer the highest quality of defense against damp attics, basements, and crawlspaces, energy inefficiency, and common moisture problems found in homes across New Jersey. For over 20 years, we have helped our friends and neighbors achieve a healthier home environment, protecting families and their homes with our moisture management services and home improvements.
Each home is as unique as those who live in it. We offer a 22-point comprehensive evaluation service, complete with moisture readings and analysis, photographs, and a complete inspection report. Our highly-trained technicians then take the time to sit with you to tailor our drainage systems and waterproofing solutions to suit your goals and budget. Our systems are designed to increase home value, lower energy spending, reduce household allergens, and create a healthier home environment, affordably. To work within any budget, we offer various payment plans and financing.
Following our evaluation, our team will provide you with:
- A detailed evaluation report of all locations evaluated.
- A full set of photos of all locations evaluated.
- A complete quote consisting of service recommendations.
- A prioritized quote consisting of all items advised based on individual circumstances.
- A summary of findings or recommendations is available upon request if needed for other realtors or attorneys.
Click the button below to speak to a representative or complete the form at the bottom of this page and a representative will be in touch with you!